Implement Chat Application using NextJS & Twilio
This article contains the first step to implementing a chat application using NextJS and Twilio.
Hello guys, after a long time, today I'm going to implement a chat application using Twilio, This is a small POC application that I need to implement as a feature of my freelancing product. To implement this we are going to use Twilio Conversations API
For the POC I'm going to implement this with NextJS 13 👌. And in this article, we are going to implement the backend API for generating the conversation token.
I think you already have a Twilio account, if not go to Twilio and create your own account, it will give you free $15.50 for a trial 👌
Here we are going to create the backend API to get the Twilio token to the frontend application. that token is used to communicate with Twilio for service usage,
When you create your account you will get an Account SID and Account secrete, You can find your AccountSID here

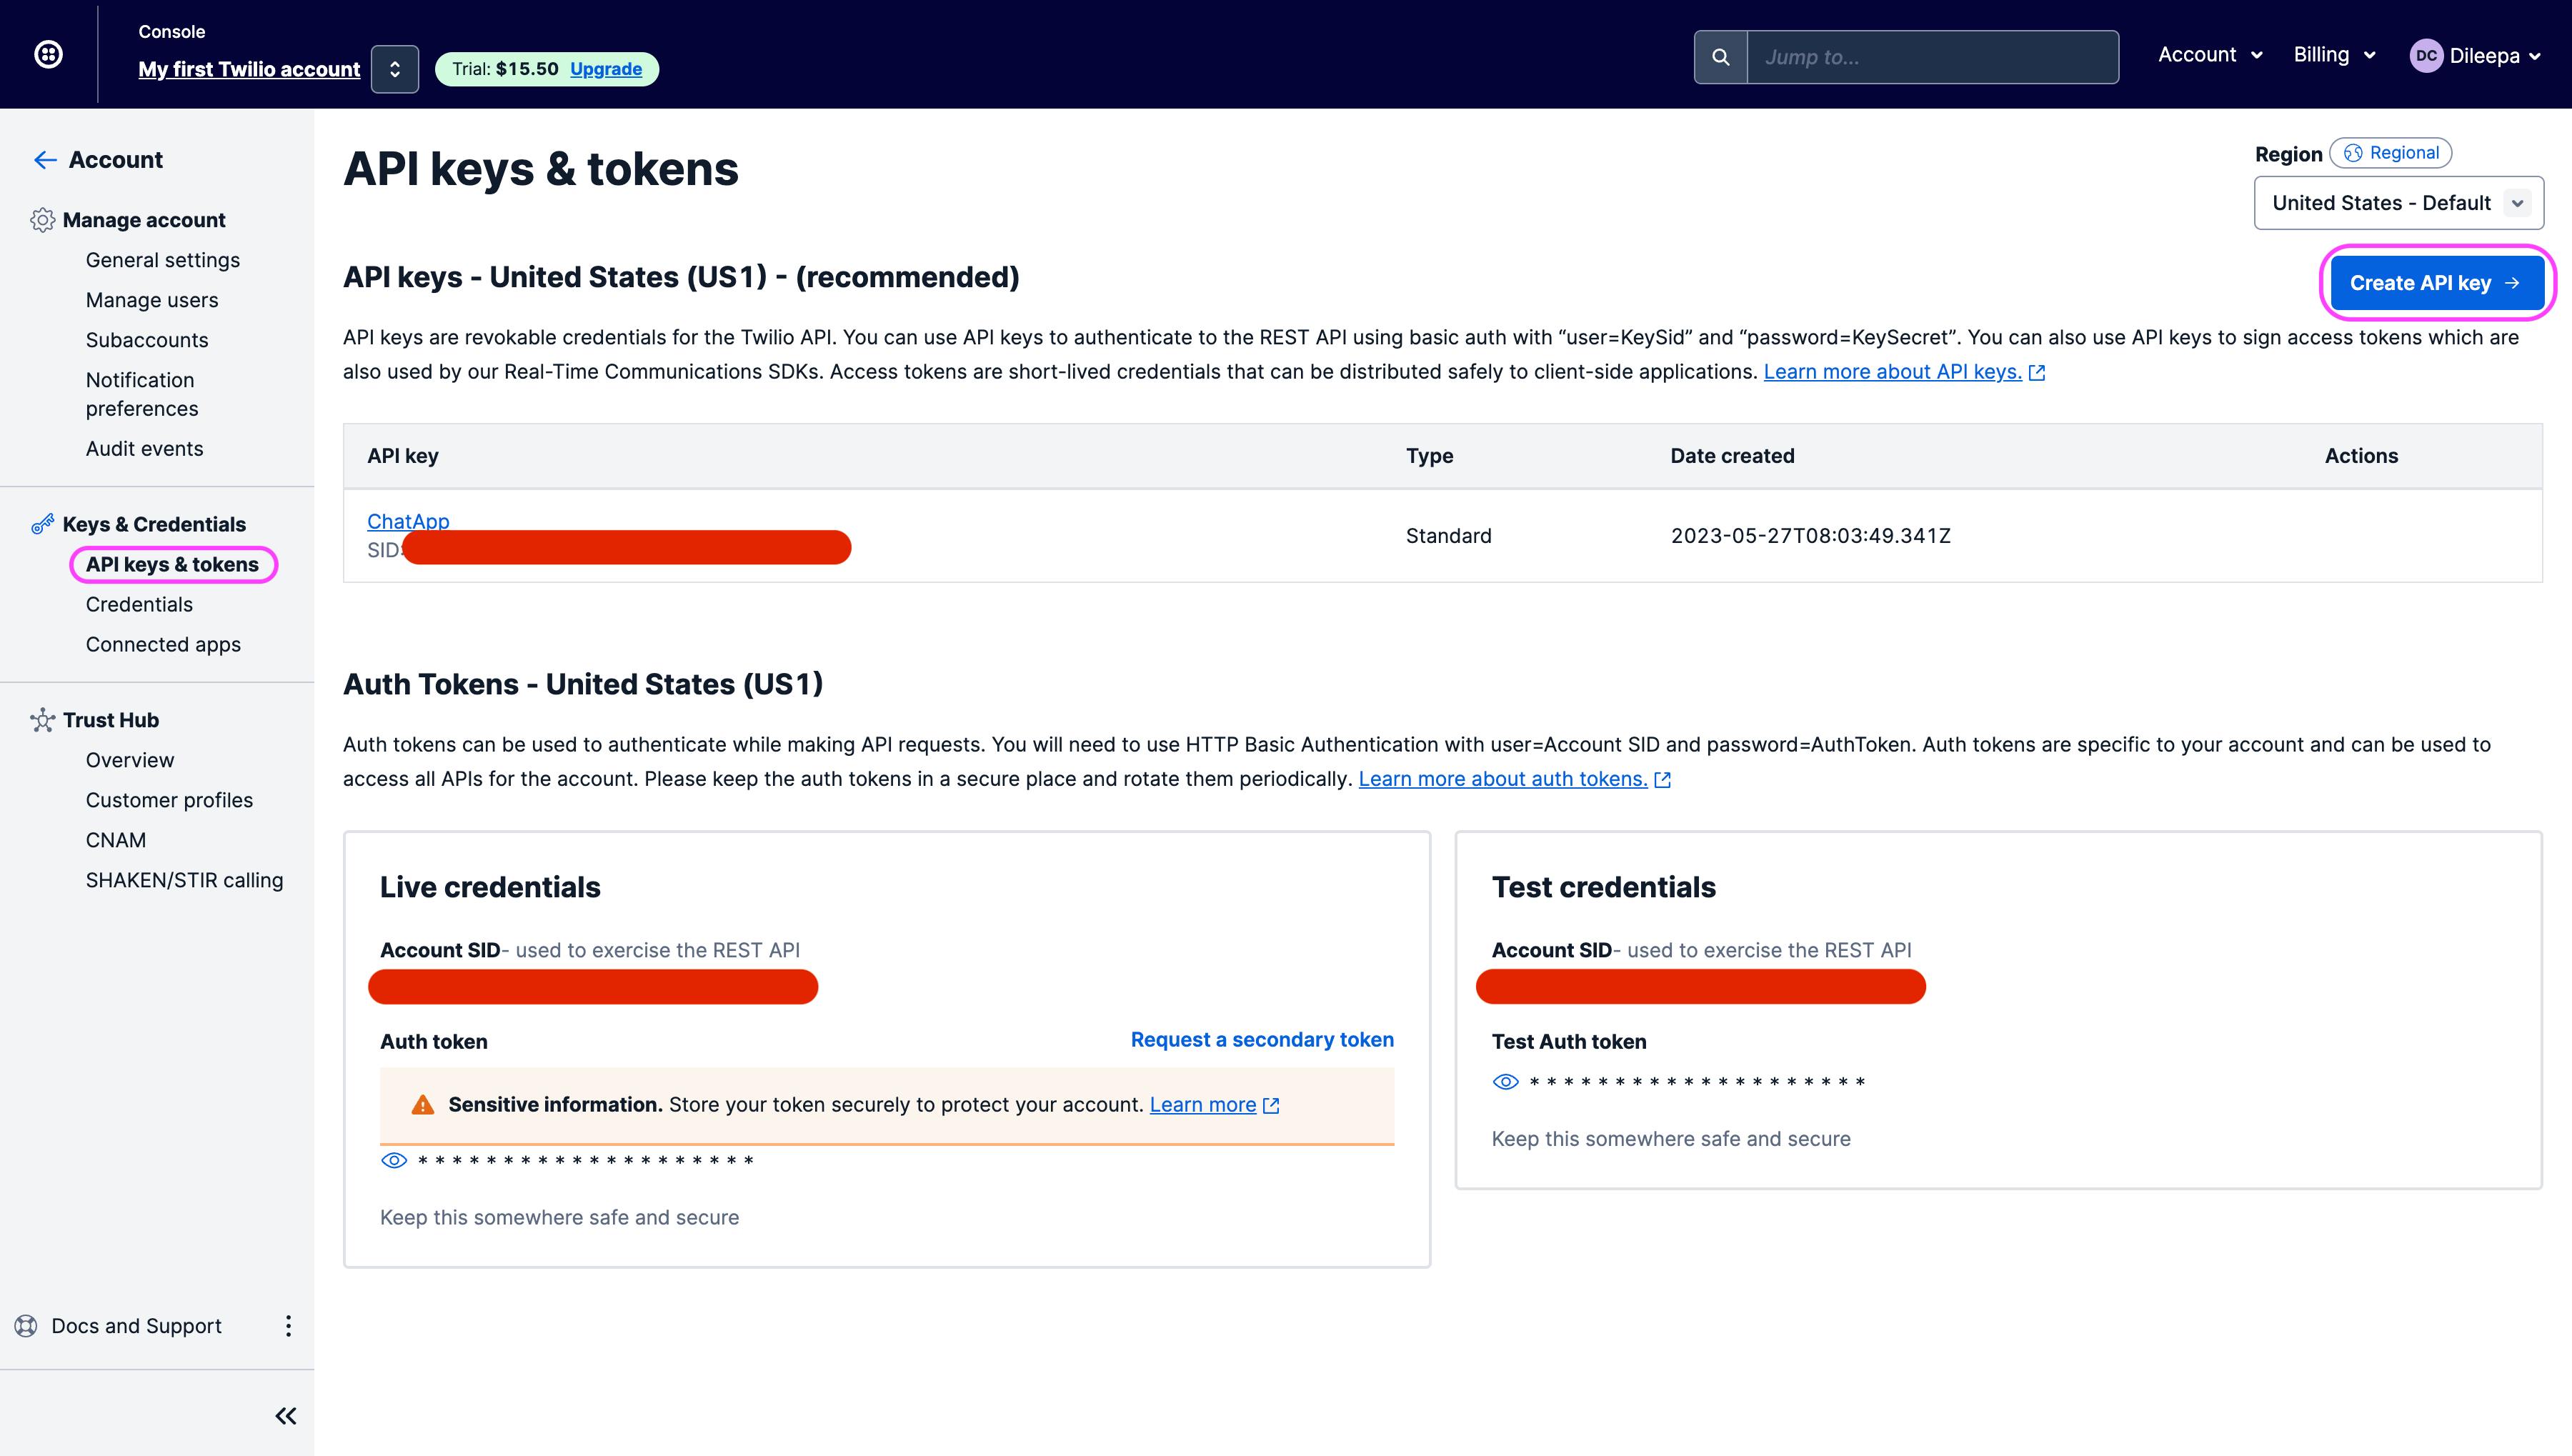
Next, we need to create the API Key, Go to account settings and then click on API keys & tokens and then Create API key and create a API Key

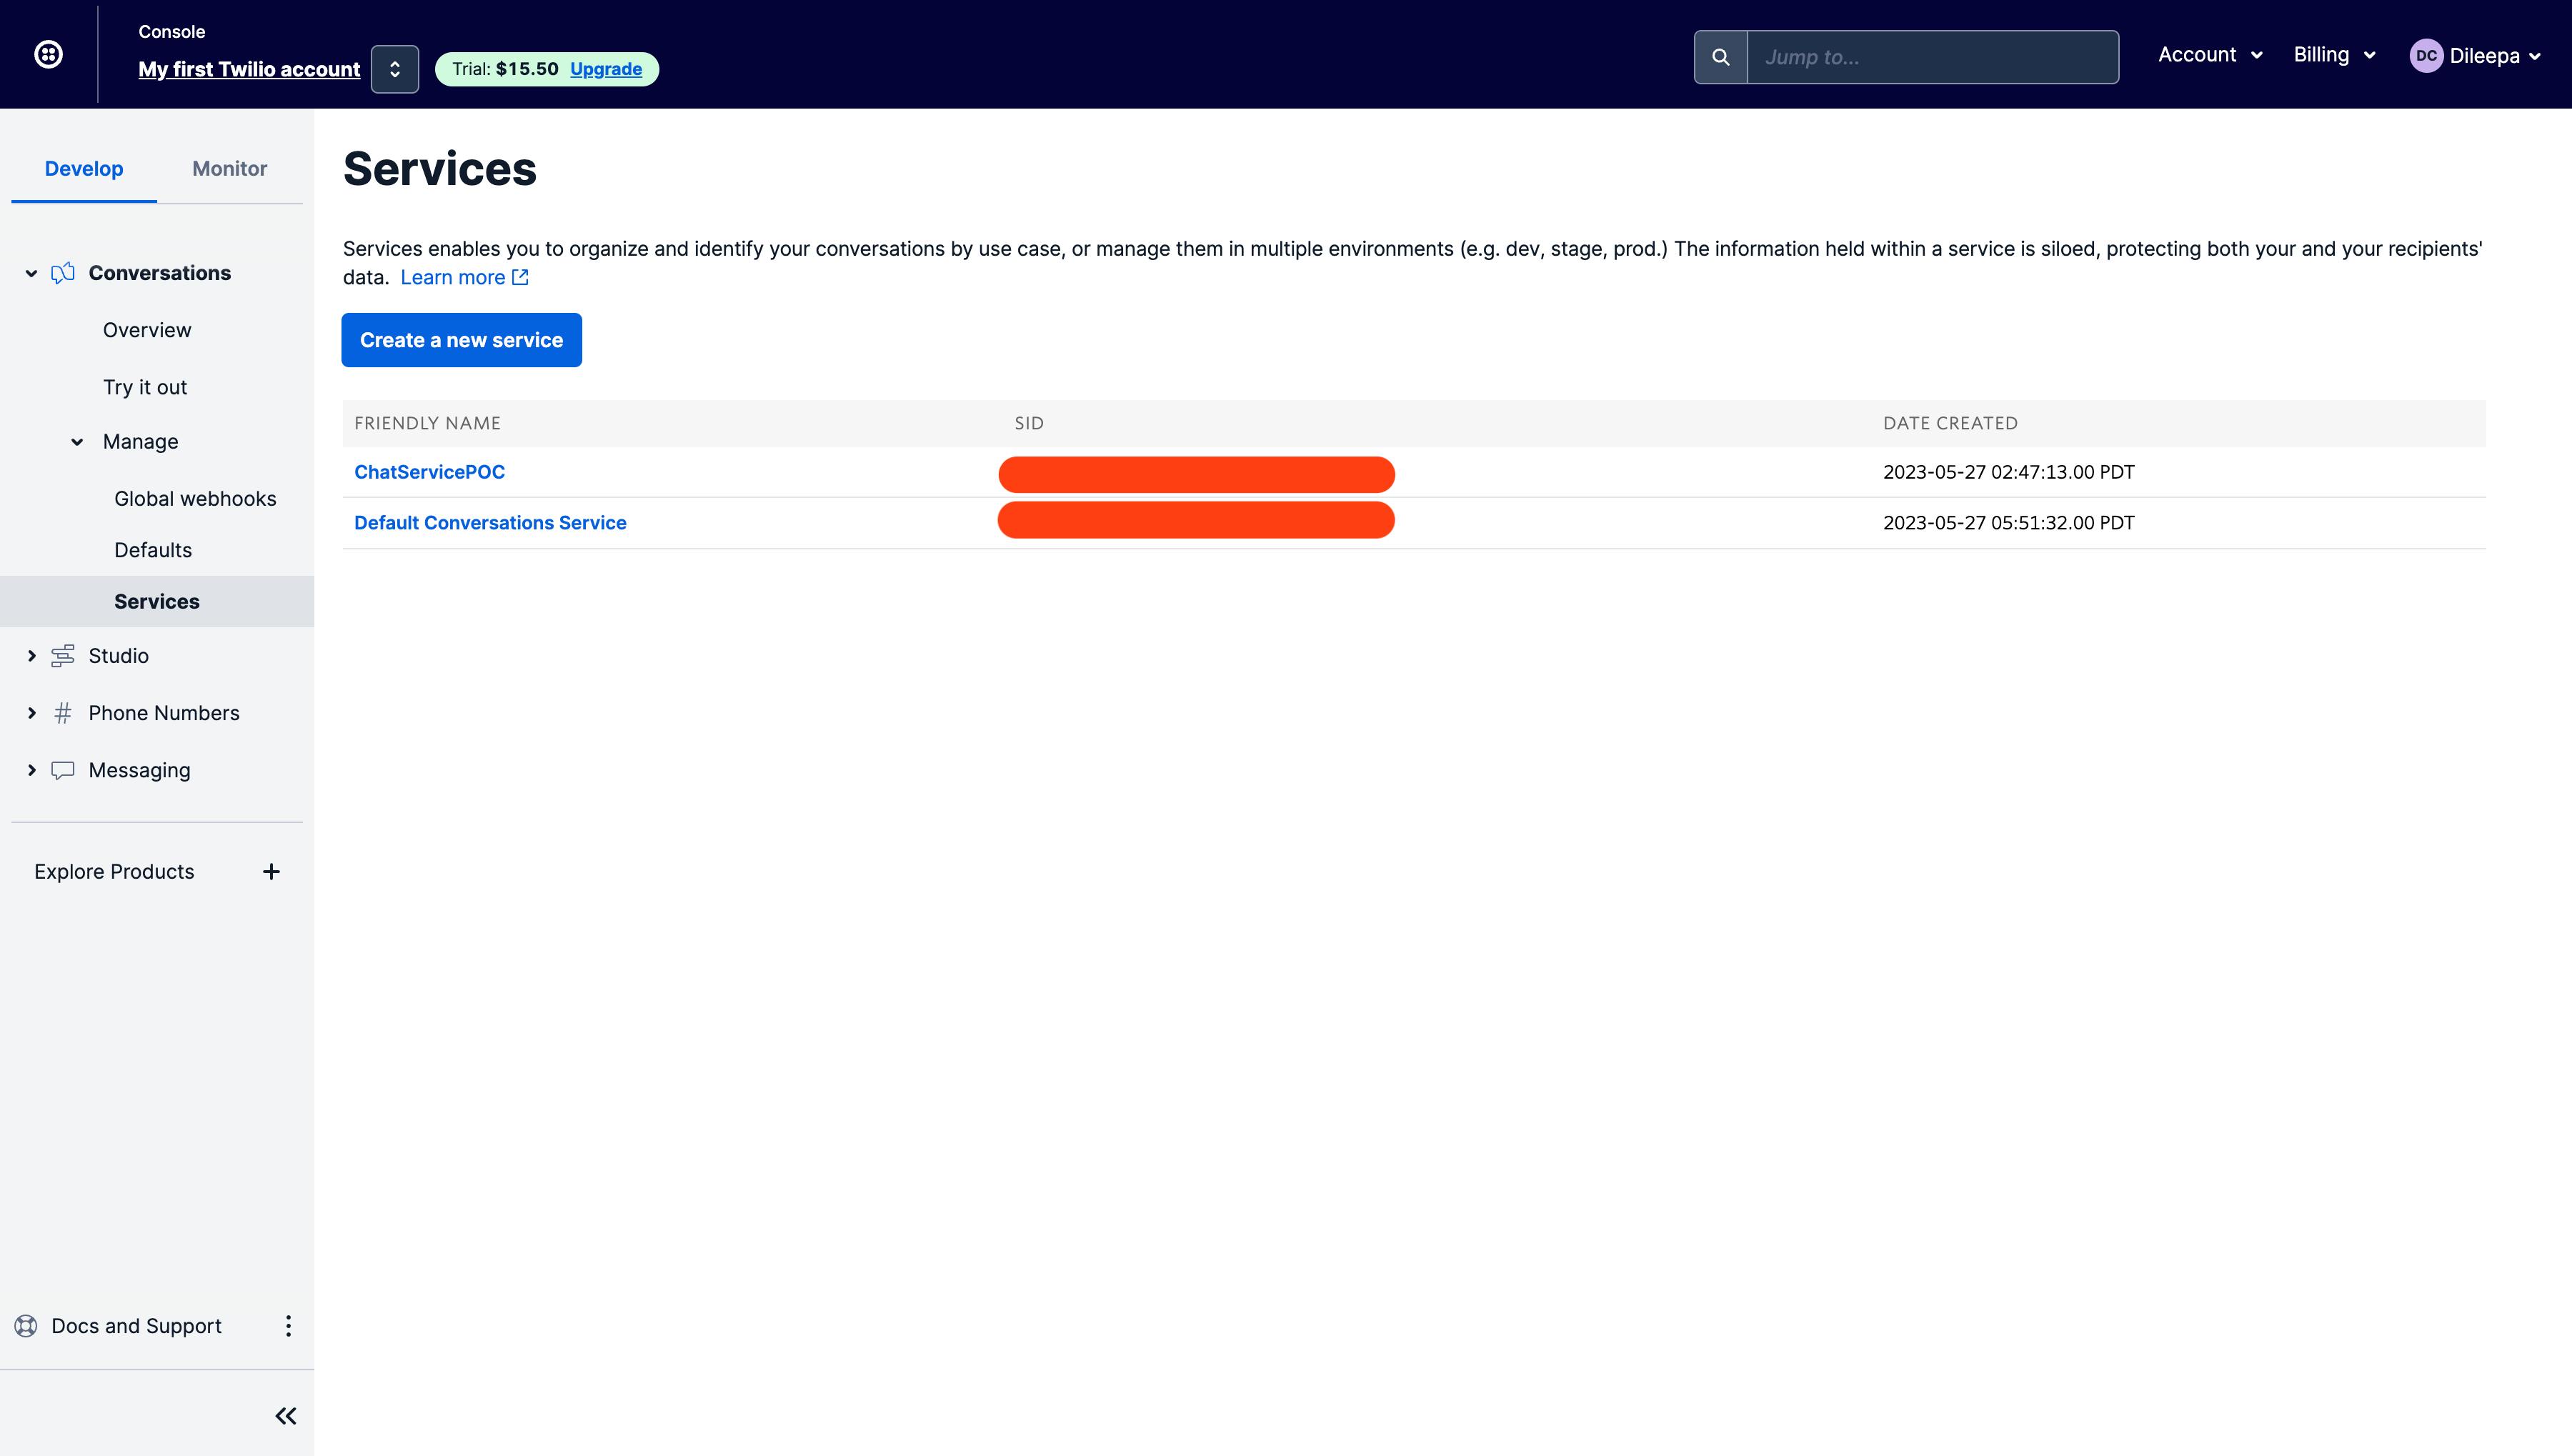
Then we need to create Service SID, for that go to Dashboard > Develop > Conversations > Services and create a new Service SID

Now you have the following details
ACCOUNT_SID // Created when you create your Twilio account
API_KEY // Created from API keys and tokens
API_SECRET // Created from API keys and tokens
SERVICE_SID // Created from Dashboard, Conversations and Services
You are ready to create your API for fetching the Twilio token 😇 , Let's create the NextJS API route. I'm using NextJS v13 and this is the recommended way to implement the API route
Let's create a api folder under app folder and create the route.ts file to make the API endpoint
We need twilio npm package to create the Twilio client and to generate the token
This is the implementation of API, the API endpoint will be
http://localhost:3000/api?identity=${username}
import { NextResponse } from "next/server";

const AccessToken = require("twilio").jwt.AccessToken;

const ChatGrant = AccessToken.ChatGrant;

const twilioAccountSid = process.env.ACCOUNT_SID;
const twilioApiKey = process.env.API_KEY;
const twilioApiSecret = process.env.API_SECRET;
const serviceSid = process.env.SERVICE_SID;

export async function GET(request: Request) {
  const { searchParams } = new URL(request.url);
  const identity = searchParams.get("identity");

  const token = new AccessToken(
    twilioAccountSid,
    twilioApiKey,
    twilioApiSecret,
    { identity }
  );

  const chatGrant = new ChatGrant({
    serviceSid: serviceSid,
  });

  token.addGrant(chatGrant);

  return NextResponse.json({
    identity: token.identity,
    jwt: token.toJwt(),
  });
}
Now we have our API for getting the Twilio token, Let's create the Client UI in the next blog post, Thanks for staying with me !!!

